How to Set Up a Screw Fastening Machine | Automated Screwdriver Guide
How to Set Up a Screw Fastening Machine
Integrating a new screw fastening machine into your production line is a significant step towards enhancing efficiency, ensuring consistent product quality, and reducing operator fatigue. A proper initial setup is paramount to achieving these benefits and avoiding costly downtime or rework due to loose or damaged fasteners. This guide provides a comprehensive overview of the key steps involved in setting up your automated screw fastening system.
1. Pre-Installation Preparation and Safety
Before any physical installation begins, thorough preparation is essential. Start by carefully unpacking the machine and inspecting all components against the packing list for any shipping damage. Ensure you have all necessary parts, including the controller, feeder bowl, driving spindle, bit set, and all cables.
Next, identify an optimal location on the assembly line. The site must be solid, level, and vibration-free, with easy access for operators and maintenance personnel. Crucially, verify that all power sources are LOCKED OUT AND TAGGED OUT (LOTO) before making any electrical connections. This non-negotiable safety step protects personnel during setup.
2. Mechanical and Electrical Installation
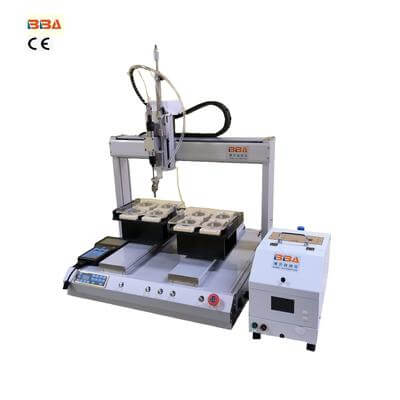
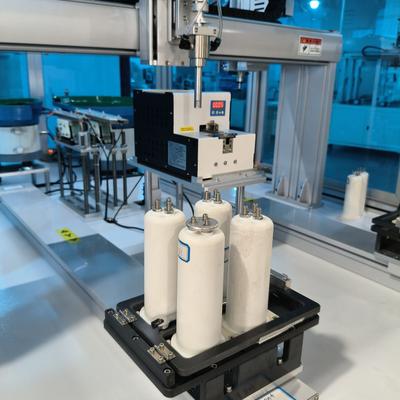
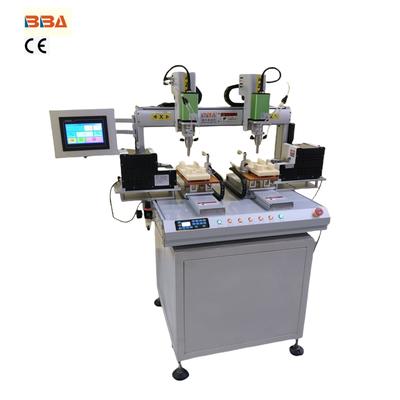
Begin by securely mounting the main unit, typically a benchtop or floor-standing model, to its designated position. Following the manufacturer's guidelines, connect the screw feeder bowl to the main unit using the provided hose or rail, ensuring a clear and unobstructed path for screws to travel.
Proceed with the electrical connections. Link the main unit to the power supply using the correct voltage and amperage as specified in the manual. Connect the feeder bowl and any peripheral devices (like a trigger switch or safety guard) to the controller. Always double-check that all connections are secure and that cables are routed safely away from moving parts or potential pinch points.
3. System Configuration and Programming
With the hardware installed, power on the system. The first task is to configure the screw feeder. Adjust the blade gap and vibration amplitude to ensure a smooth, consistent flow of screws to the driving head without jamming or multi-feeding.
Then, program the fastening parameters into the machine's controller. This is a critical phase for quality control. Key parameters to set include:
- Target Torque: The desired final tightening force (e.g., 2.5 Nm).
- Speed: The rotational speed of the driver (faster for coarse threading, slower for precision).
- Fastening Strategy: This may involve a simple one-stage torque mode or a more complex multi-stage strategy like "snug torque" followed by "final angle."
- Acceptance Window: Define upper and lower limits for both torque and angle to create a process window. Any fastening result outside this window will be flagged as an error.
4. Calibration and Test Run
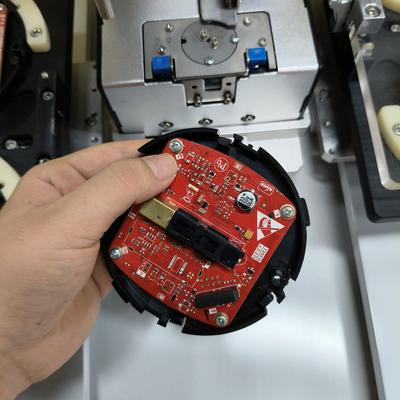
Load the correct screws into the feeder bowl. It is vital to use the exact screw type (length, head type, thread) the system was configured for. Even minor discrepancies can cause jams.
Perform a series of test fastenings on scrap material or sample workpieces. Observe the entire process: the screw must be picked up cleanly, driven straight without cross-threading, and stopped consistently at the programmed torque or angle. Listen for unusual noises that might indicate misalignment or mechanical issues.
Check the first several finished joints with a torque wrench to verify the machine's accuracy. Adjust the programming parameters in small increments if necessary and repeat the tests until the results are consistently within the specified tolerance.
5. Integration and Operator Training
Once the machine is calibrated, integrate it into the full production workflow. This may involve synchronizing it with a conveyor belt, a robotic arm, or manual operator stations using sensors or programmable logic controllers (PLC).
Finally, train all operators and line technicians on its basic operation. They should know how to start and stop the machine, clear common jams safely, perform basic quality checks, and identify error messages. Emphasize that they should never reach into the feeding or driving areas while the system is powered on.
A meticulous setup process is an investment that pays dividends in long-term, reliable performance. By following these structured steps, you can ensure your new screw fastening machine operates at peak efficiency from its very first day on the job, delivering the precision and reliability that modern manufacturing demands.
| Product Name | Applicable industries |
| Auto Screwdriver Machine | Telecommunication Equipment Assembly |